6 Best Thermometers for Compost
The smell of damp earth and the heat radiating from a pile of decaying organic matter are the primary indicators of a functioning biological reactor. When the microbial population hits its peak, the internal temperature of a compost pile should reach between 131 and 160 degrees Fahrenheit. Maintaining this thermal range ensures the destruction of weed seeds and pathogens while accelerating the breakdown of lignin and cellulose. Without precise measurement, you are merely guessing at the rate of decomposition. Utilizing the best thermometers for compost allows a grower to monitor the transition from mesophilic to thermophilic phases. This data is critical for determining when to turn the pile to introduce oxygen, preventing the system from sliding into an anaerobic state. A high quality probe must penetrate at least 20 inches into the core to bypass the cooler outer insulating layer. Success in the garden begins with the quality of the humus produced; therefore, monitoring the heat signature of your nitrogen and carbon inputs is a non-negotiable requirement for professional soil management.
Materials:

To produce high quality compost, the starting substrate must maintain a **Carbon-to-Nitrogen (C:N) ratio of 30:1**. The physical texture should be a friable loam once finished, but the raw materials require specific chemical balance. High nitrogen inputs like fresh manure or grass clippings provide an **NPK ratio of approximately 4-1-2**, while carbon sources like straw or shredded wood have negligible nutrient values but provide the structural matrix for aeration. The soil pH of the finished product should stabilize between **6.0 and 7.5** to optimize the Cation Exchange Capacity (CEC). A high CEC ensures that the finished humus can hold onto essential cations like **Calcium (Ca2+) and Magnesium (Mg2+)**, preventing them from leaching through the soil profile during heavy irrigation or rainfall events.
Timing:
The biological clock of a compost pile is independent of the frost date, provided the mass is large enough to self-insulate. In Hardiness Zones 4 through 6, a minimum volume of one cubic yard is required to maintain thermophilic temperatures during the winter months. In warmer Zones 8 through 10, smaller piles are viable, but they risk desiccation. The transition from the vegetative growth of the microbial colony to the reproductive and peak metabolic stages occurs within 48 to 72 hours of pile construction. Monitoring this timeline is essential; if temperatures do not rise within three days, the nitrogen levels are likely insufficient to support the microbial population.
Phases:

Sowing the Pile
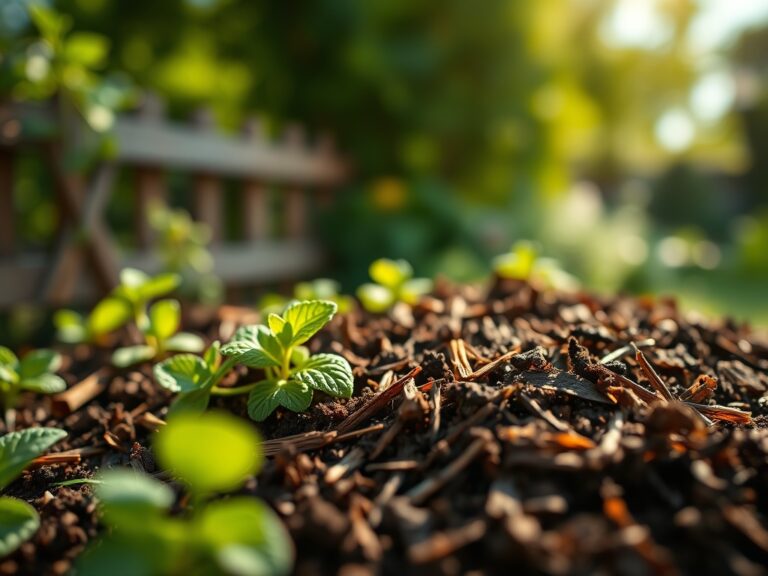
Initial construction involves layering green and brown materials to maximize surface area for microbial colonization. The moisture content must be maintained at 50 to 60 percent, similar to the feel of a wrung out sponge.
Pro-Tip: Introduce a shovel of finished compost to act as a microbial inoculant. This utilizes mycorrhizal symbiosis and existing bacterial colonies to bypass the lag phase of the decomposition cycle.
Transplanting and Turning
Once the core reaches 150 degrees Fahrenheit, the material must be moved from the outside to the inside. This ensures all weed seeds are exposed to lethal temperatures. This mechanical agitation also prevents the compaction of the substrate.
Pro-Tip: Turning the pile prevents auxin suppression in future plants by ensuring the complete breakdown of allelopathic compounds found in certain "brown" materials like walnut leaves or eucalyptus.
Establishing the Cure
After the thermophilic phase ends and temperatures drop below 100 degrees Fahrenheit, the pile enters the curing stage. This lasts for 4 to 8 weeks and allows the fungal networks to stabilize the organic compounds.
Pro-Tip: Curing allows for the stabilization of turgor pressure in the finished humus. This ensures that when the compost is applied to the rhizosphere, it does not draw nitrogen away from the plant roots to complete its own decomposition.
The Clinic:
Monitoring the health of your compost and the plants it feeds requires recognizing physiological disorders.
- Symptom: Putrid, rotten egg odor from the compost pile.
Solution: This indicates anaerobic conditions due to excess moisture or lack of oxygen. Turn the pile immediately and add dry carbon sources like sawdust or straw to restore porosity. - Symptom: Nitrogen Chlorosis (yellowing of older leaves) in plants treated with fresh compost.
Solution: The compost was likely "hot" or unfinished, causing a nitrogen tie-up. Apply a liquid kelp or fish emulsion with a 5-1-1 NPK ratio to provide immediate nitrate availability. - Symptom: Tip burn on new growth.
Solution: This is often a sign of high salt accumulation or boron toxicity from municipal waste compost. Flush the rhizosphere with 2 inches of water to leach excess salts beyond the root zone.
Maintenance:
Precision in the garden requires the right equipment and consistent habits. Use a soil moisture meter to verify that the compost remains at the ideal hydration level; if the meter reads below 40 percent, microbial activity will cease. Apply 1.5 inches of water per week directly at the drip line of plants amended with compost to ensure the nutrients are carried into the root zone. When incorporating compost into the soil, a hori-hori knife is the superior tool for precision mixing without destroying the existing soil structure. For woody perennials, use bypass pruners to remove any dead or diseased tissue before applying a 2 inch mulch layer of finished compost to the base of the plant.
The Yield:
Harvesting the benefits of your compost involves timing the application to the plant's growth cycle. For edible crops, apply finished compost 2 to 4 weeks prior to planting to allow the soil biology to integrate. When harvesting vegetables, do so in the early morning when turgor pressure is at its highest. This ensures the cell walls are fully hydrated, leading to better "day-one" freshness and a longer shelf life. Post-harvest, immediately move produce to a cool, shaded area to slow down the rate of senescence and enzymatic breakdown.
FAQ:
What is the ideal temperature for a compost pile?
The core should reach between 131 and 160 degrees Fahrenheit. This range is hot enough to kill pathogens and weed seeds while allowing thermophilic bacteria to break down complex organic polymers like cellulose and lignin effectively.
How deep should I insert the thermometer?
Insert the probe at least 12 to 20 inches into the center of the pile. This ensures you are measuring the internal metabolic heat of the microbial colony rather than the ambient temperature of the outer insulating layers.
Why is my compost pile not heating up?
A cold pile usually lacks nitrogen or moisture. Ensure your C:N ratio is 30:1 and moisture is at 50 percent. If the pile is too small, it cannot retain enough heat to reach thermophilic levels.
Can compost get too hot?
Yes, temperatures exceeding 170 degrees Fahrenheit can kill beneficial microbes and potentially lead to spontaneous combustion in very large piles. If the temperature spikes too high, turn the pile to release trapped heat and moisture.